Loading...
Searching...
No Matches
Converter Tools
convertVol
Usage: convertVol [input] [output]Allowed options are:
Examples:
To upgrade a "Version-2" vol file to a "Version-3" (default Vol writer):
Positionals:
1 TEXT:FILE REQUIRED volumetric file (.pgm3d, .vol, .longvol).
Options:
-h,--help Print this help message and exit
-i,--input TEXT:FILE REQUIRED volumetric file (.pgm3d, .vol, .longvol).
-o,--output TEXT volumetric file (.pgm3d, .vol, .longvol)
$ convertVol ${DGtal}/examples/samples/lobster.vol convertedVol.p3d
Definition ATu0v1.h:57
- See also
- convertVol.cpp
dicom2vol
Usage: dicom2vol [input] [output]Allowed options are:
Example:
Positionals:
1 TEXT:FILE REQUIRED dicom image (.dcm).
2 TEXT:FILE volumetric file (.vol, .longvol .pgm3d, .raw).
Options:
-h,--help Print this help message and exit
-i,--input TEXT:FILE REQUIRED dicom image (.dcm).
-o,--output TEXT volumetric file (.vol, .longvol .pgm3d, .raw)
--dicomMin INT set minimum density threshold on Hounsfield scale
--dicomMax INT set maximum density threshold on Hounsfield scale
$ dicom2vol -i ${DGtal}/tests/samples/dicomSample/1629.dcm --dicomMin 0 --dicomMax 300 -o sample.vol
- See also
- dicom2vol.cpp
freeman2img
The transformation can fill shapes with hole by using the freemanchain orientation. The interior is considered on the left according to a freeman chain move, i.e. a clockwise oriented contour represents a hole in the shape.Usage: freeman2img [input] [output]Allowed options are:
Example:
 Example with several contours: The file located in $DGtal/examples/samples/contourS2.fc contains different contours with some ones corresponds to hole. We can apply the same conversion as the previous example:You will obtain such image:
Positionals:
1 TEXT:FILE REQUIRED Input freeman chain file name.
2 TEXT:FILE the output file name.
Options:
-h,--help Print this help message and exit
-i,--input TEXT:FILE REQUIRED Input freeman chain file name.
-b,--border UINT add a border in the resulting image (used only in the automatic mode i.e when --space is not used.
-o,--output TEXT=result.pgm the output file name
-s,--space INT x 4 Define the space from its bounding box (lower and upper coordinates) else the space is automatically defined from the freemanchain bounding boxes.
$freeman2img ${DGtal}/tests/samples/contourS.fc sample.pgm
You will obtain such image:
Resulting image
$ freeman2img $DGtal/examples/samples/contourS2.fc sample2.pgm
Resulting image
- See also
- img2freeman freeman2img.cpp
freeman2sdp
Usage: freeman2sdp [input] > output.sdpAllowed options are:
Positionals:
1 TEXT:FILE REQUIRED Input freeman chain file name.
Options:
-h,--help Print this help message and exit
-i,--input TEXT:FILE REQUIRED Input freeman chain file name.
-o,--oneLine output the digital contour in one line like: X0 Y0 X1 Y1 ... XN YN
--info adds some info as comments at the beginning of the file.
@b Example:
@code
freeman2sdp -i ${DGtal}/tests/samples/contourS.fc > contourS.sdp
You will obtain such result:
   $ more contourS.sdp
   # grid curve 1/1 closed
   13 60
   14 60
   14 59
   14 58
   15 58
   15 57
   16 57
   16 56
   17 56
   17 55
   17 54
   18 54
   ...
- See also
- freeman2sdp.cpp
HDF52vol
Usage: HDF52vol [input] [output]Allowed options are:
Example:
Positionals:
1 TEXT:FILE REQUIRED volumetric file (.pgm3d, .vol, .longvol).
Options:
-h,--help Print this help message and exit
-i,--input TEXT:FILE REQUIRED the input FreemanChain file name
-o,--output TEXT the output filename
$HDF52vol -i ${DGtal}/tests/samples/ex_image2.h5 -o out.vol
- See also
- HDF52vol.cpp
heightfield2shading
You can choose between lambertian model (diffuse reflectance) and specular model (Nayar reflectance model). You can also choose between a single directional light source (using -l{x,y,z} options) or use light source which emits in all direction (by specifying the light source position with -p{x,y,z} option). Another rendering mode is given from a bitmap reflectance map which represents the rendering for a normal vector value (mapped according the x/y coordinates).Usage: heightfield2shading [input] [output]Allowed options are:
Example:
 Other example:
Positionals:
1 TEXT:FILE REQUIRED mesh file (.off)
2 TEXT=result.pgm sequence of discrete point file (.sdp)
Options:
-h,--help Print this help message and exit
-i,--input TEXT:FILE REQUIRED mesh file (.off)
-o,--output TEXT=result.pgm sequence of discrete point file (.sdp)
-s,--meshScale FLOAT change the default mesh scale (each vertex multiplied by the scale)
-a,--remeshMinArea FLOAT=0.01 ajust the remeshing min triangle are used to avoid empty areas
--heightFieldMaxScan INT=255 set the maximal scan deep.
-x,--centerX INT=0 choose x center of the projected image.
-y,--centerY INT=0 choose y center of the projected image.
-z,--centerZ INT=200 choose z center of the projected image.
--nx FLOAT=0 set the x component of the projection direction.
--ny FLOAT=0 set the y component of the projection direction.
--nz FLOAT=1 set the z component of the projection direction.
-v,--invertNormals invert normal vector of the mesh
--width FLOAT=500 set the width of the area to be extracted as an height field image. (note that the resulting image width also depends of the scale parameter (option --meshScale))
--height FLOAT=500 set the height of the area to extracted as an height field image. (note that the resulting image height also depends of the scale parameter (option --meshScale))
--orientAutoFrontX automatically orients the camera in front according the x axis.
--orientAutoFrontY automatically orients the camera in front according the y axis.
--orientAutoFrontZ automatically orients the camera in front according the z axis.
--orientBack change the camera direction to back instead front as given in orientAutoFront{X,Y,Z} options.
--exportNormals export mesh normal vectors (given in the image height field basis).
--backgroundNormalBack set the normals of background in camera opposite direction (to obtain a black background in rendering).
--setBackgroundLastDepth change the default background (black with the last filled intensity).
You will obtain such image:
Resulting image with a 90° ccw rotation
You will obtain such image:
Resulting image with a 90° ccw rotation (and conversion to png)
- See also
- heightfield2shading.cpp
heightfield2vol
Usage: heightfield2vol [OPTIONS] 1 [2]Allowed options are:
Example:
Positionals:
1 TEXT REQUIRED input heightfield file (2D image).
2 TEXT output volumetric file.
Options:
-h,--help Print this help message and exit
-i,--input TEXT REQUIRED input heightfield file (2D image).
-o,--output TEXT output volumetric file.
-s,--scale FLOAT set the scale factor on height values (default 1.0)
-z,--volZ UINT set the Z max value of domain.
-f,--foregroundValue UINT specify the foreground value of the resulting voxel.
-b,--backgroundValue UINT specify the background value of the resulting volumetric file.
$ heightfield2vol ${DGtal}/examples/samples/church.pgm volResu.vol -s 0.3 -z 50
You will obtain such image:
Resulting image.
- See also
- heightfield2vol.cpp
img2freeman
Allowed options are:
Example:
Positionals:
1 TEXT:FILE REQUIRED input image file name (any 2D image format accepted by DGtal::GenericReader).
contourSelect INT x 3 Select contour according reference point and maximal distance: ex. --contourSelect X Y distanceMax
Options:
-h,--help Print this help message and exit
-i,--input TEXT:FILE REQUIRED input image file name (any 2D image format accepted by DGtal::GenericReader).
-m,--min FLOAT min image threshold value (default 128)
-M,--max FLOAT max image threshold value (default 255)
--sort to sort the resulting freemanchain by decreasing size.
-s,--minSize UINT minSize of the extracted freeman chain (default 0)
-r,--thresholdRangeMin INT x 3 use a range interval as threshold (from min) : --thresholdRangeMin min increment max : for each possible i, it define a digital sets [min, min+((i+1)*increment)] such that min+((i+1)*increment)< max and extract their boundary.
-R,--thresholdRangeMax INT x 3 use a range interval as threshold (from max) : --thresholdRangeMax min increment max : for each possible i, it define a digital sets [ max-((i)*increment), max] such that max-((i)*increment)>min and extract their boundary.
$ img2freeman ${DGtal}/examples/samples/church.pgm > contours.fc
You will obtain such results:
more contours.fc
0 138 032
0 155 032
0 202 032
0 265 010122
0 268 0030100323232232
0 300 01101003223303222
0 395 012
0 398 0001012111111111110111111011222232
0 408 032
0 425 012
0 428 010323003301032330001032300030003030003003000032323033322332322332230333333322221222222223000000030000033323332323032230321233003323322300322223223032322121110011223232110012211111111112
1 131 00100032322221
1 277 103321
2 393 112330
2 288 00032221
2 296 0321
2 373 0321
3 424 1230
3 192 0321
390 767 3303000000030030333333001011033333230003323223233030303010111003303233010332332233000333000010103033030330030101110030333230301003332321233223322222123233303322332333330030330303322321211212123222332330010003222332233010033232300030111011010032323032233333303301030010033033321221222332300033212....
- See also
- img2freeman.cpp
imgAddNoise
Allowed options are:
Example:
Positionals:
1 TEXT:FILE REQUIRED input image file name (any 2D image format accepted by DGtal::GenericReader).
2 TEXT=result.png output image file name (any 2D image format accepted by DGtal::GenericWriter)
Options:
-h,--help Print this help message and exit
-i,--input TEXT:FILE REQUIRED input image file name (any 2D image format accepted by DGtal::GenericReader).
-o,--output TEXT=result.png output image file name (any 2D image format accepted by DGtal::GenericWriter)
-n,--noise FLOAT=0.5 Kanungo noise level in ]0,1[ (default 0.5)
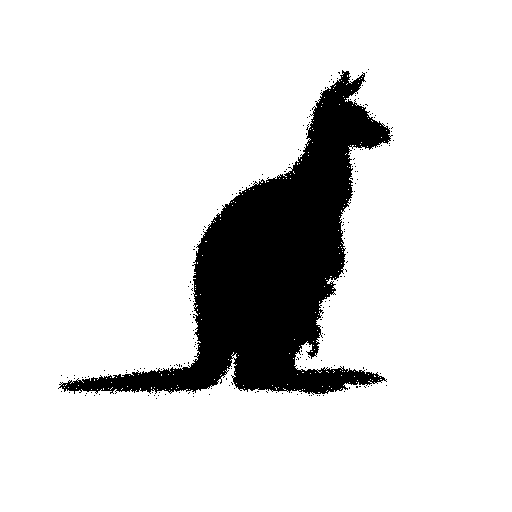
$ imgAddNoise ${DGtal}/examples/samples/klokan.pgm noise.pgm
You will obtain such image:
Resulting image.
- See also
- imgAddNoise.cpp
itk2vol
Allowed options are:
Positionals:
1 TEXT:FILE REQUIRED Any file format in the ITK library (mhd, mha, ...).
2 TEXT volumetric file (.vol, .pgm3d).
Options:
-h,--help Print this help message and exit
-i,--input TEXT:FILE REQUIRED Any file format in the ITK library (mhd, mha, ...).
-o,--output TEXT volumetric file (.vol, .pgm3d).
-m,--maskImage TEXT Use a mask image to remove image part (where mask is 0). The default mask value can be changed using mask default value.
-r,--maskRemoveLabel INT Change the label value that defines the part of input image to be removed by the option --maskImage.
--inputMin INT set minimum density threshold on Hounsfield scale.
--inputMax INT set maximum density threshold on Hounsfield scale.
-t,--inputType TEXT:{int,double} to sepcify the input image type (int or double).
@b Example:
@code
$itk2vol image.mhd sample.vol --dicomMin -500 --dicomMax -100
- See also
- itk2vol.cpp
longvol2vol
Usage: longvol2vol [input] [output]Allowed options are:
Example:
Positionals:
1 TEXT:FILE REQUIRED Input longvol filename ( .longvol)
2 TEXT Output vol filename.
Options:
-h,--help Print this help message and exit
-i,--input TEXT:FILE REQUIRED Input longvol filename ( .longvol)
-o,--output TEXT Output vol filename.
-m,--mode UINT:{0,1,2} Conversion mode:
0 = cast (default)
1 = Linear Scaling
2 = Grayscale cycle (32 steps, except 0 values).
$ longvol2vol ${DGtal}/tests/samples/test.longvol out.vol
- See also
- longvol2vol.cpp
mesh2heightfield
The 3D mesh is discretized and scanned in the normal direction N, starting from P with a step 1.Usage: mesh2heightfield [input] [output]Allowed options are:
Example:
Positionals:
1 TEXT:FILE input heightfield file (2D image).
2 TEXT output image.
Options:
-h,--help Print this help message and exit
-i,--input TEXT:FILE input heightfield file (2D image).
-d,--domain UINT x 2 specify the domain (required when normal are imported and if --inout is not given).
-o,--output TEXT output image.
--importNormal TEXT import normals from file.
--orderedNormalsImport Use ordered normals.
--lightDir,--lDir,--ld FLOAT x 3 light source direction: lx ly lz.
--lightPos,--lPos,--lp FLOAT x 3 light source position: px py pz.
-s,--specularModel FLOAT x 3 use specular Nayar model with 3 param Kdiff, Kspec, sigma.
-r,--reflectanceMap TEXT:FILE specify a image as reflectance map.
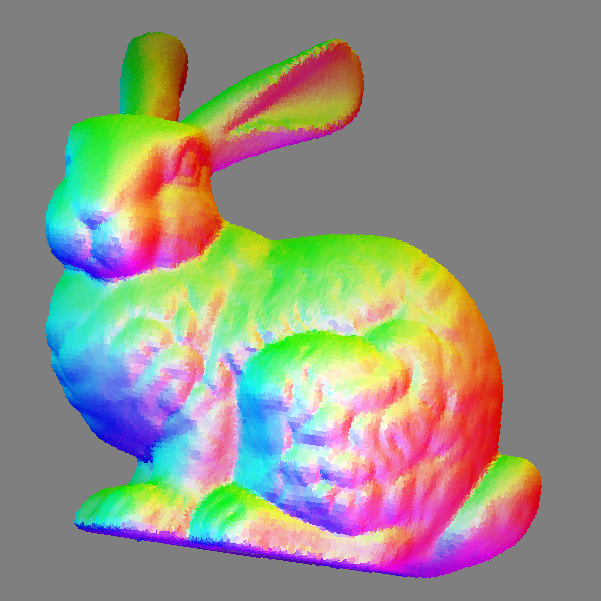
--hsvShading use shading with HSV shading (given from the normal vector)
--normalMap generates normal map.
-v,--invertNormals invert normal orientations.
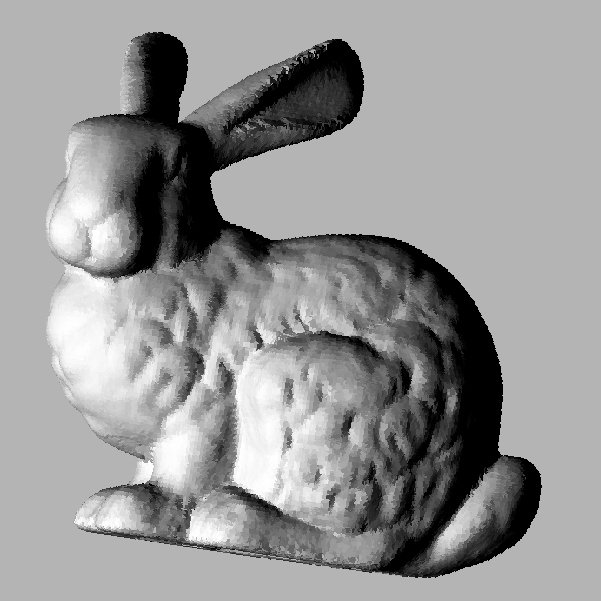
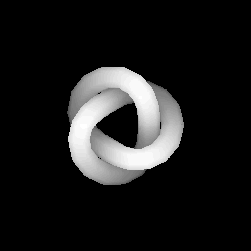
$ mesh2heightfield -i ${DGtal}/examples/samples/tref.off heighfield.pgm
You will obtain such image:
Resulting heightfield.
- See also
- mesh2heightfield.cpp
mesh2vol
Usage: mesh2vol [input]Allowed options are:
Example:
positionals:
1 TEXT:FILE REQUIRED mesh file (.off).
2 TEXT=result.vol filename of ouput volumetric file (vol, pgm3d, ...).
Options:
-h,--help Print this help message and exit
-i,--input TEXT:FILE REQUIRED mesh file (.off).
-o,--output TEXT=result.vol filename of ouput volumetric file (vol, pgm3d, ...).
-m,--margin UINT add volume margin around the mesh bounding box.
-d,--objectDomainBB use the digitization space defined from bounding box of input mesh. If seleted, the option --resolution will have no effect.
-s,--separation UINT:{6,26}=6 voxelization 6-separated or 26-separated.
-f,--fillValue change the default output volumetric image value in [1...255].
-r,--resolution UINT=128 digitization domain size (e.g. 128). The mesh will be scaled such that its bounding box maps to [0,resolution)^3.
$ mesh2vol -i ${DGtal}/examples/samples/tref.off --separation 26 --resolution 256 -o output.vol
- See also
- mesh2vol.cpp
ofs2off
Usage: ofs2off [input] [output]Allowed options are:
Example:
Positionals:
1 TEXT:FILE REQUIRED ofs file (.ofs).
2 TEXT:FILE ofs file (.ofs).
Options:
-h,--help Print this help message and exit
-i,--input TEXT:FILE REQUIRED ofs file (.ofs).
-o,--output TEXT ofs file (.off)
$ ofs2off input.ofs output.off
- See also
- ofs2off.cpp
raw2HDF5
Usage: raw2HDF5 [input] [output]Allowed options are:
Example:
Positionals:
1 TEXT:FILE REQUIRED Input raw file.
Options:
-h,--help Print this help message and exit
-i,--input TEXT:FILE REQUIRED Input raw file.
-o,--output TEXT=result.hdf5 Output hdf5 filename.
--x UINT REQUIRED x extent.
--y UINT REQUIRED y extent.
--z UINT REQUIRED z extent.
$ raw2HDF5 -x 128 -y 128 -z 128 -i input.raw -o output.hd
- See also
- raw2HDF5.cpp
raw2vol
Allowed options are:
Example:
Allowed options are: :
Positionals:
1 TEXT:FILE REQUIRED Input raw file.
2 TEXT:FILE REQUIRED Input raw file.
Options:
-h,--help Print this help message and exit
-i,--input TEXT:FILE REQUIRED Input raw file.
-o,--output TEXT=result.vol Output vol filename.
--x UINT REQUIRED x extent.
--y UINT REQUIRED y extent.
--z UINT REQUIRED z extent.
$ raw2vol -x 128 -y 128 -z 128 -i input.raw -o output.vol
- See also
- raw2vol.cpp
sdp2vol
Allowed options are:
Example:
Positionals:
1 TEXT:FILE REQUIRED Sequence of 3d Discrete points (.sdp).
2 TEXT Vol file (.vol, .longvol, .pgm3d)
Options:
-h,--help Print this help message and exit
-i,--input TEXT:FILE REQUIRED Sequence of 3d Discrete points (.sdp).
-o,--output TEXT Vol file (.vol, .longvol, .pgm3d)
-f,--foregroundVal INT value which will represent the foreground object in the resulting image (default 128)
-b,--backgroundVal INT value which will represent the background outside the object in the resulting image (default 0)
-d,--domain INT x 6 customizes the domain of the resulting image xmin ymin zmin xmax ymax zmax (computed automatically by default)
--invertY Invert the Y axis (image flip in the y direction)
$ sdp2vol volumePoints.sdp volume.vol -d 0 0 0 10 10 10
- See also
- sdp2vol.cpp
slice2vol
Allowed options are: Example:
Options:
-h,--help Print this help message and exit
-i,--input TEXT ... REQUIRED input 2D files (.pgm)
-o,--output TEXT volumetric file (.vol, .longvol .pgm3d)
-s,--sliceOrientation UINT:{0,1,2}=2 specify the slice orientation for which the slice are defined (by default =2 (Z direction))
$ slice2vol -i slice1.pgm slice2.pgm slice3.pgm -o out.vol
- See also
- slice2vol.cpp
vol2heightfield
Usage: vol2heightfield [input] [output]Allowed options are:
Example: You should obtain such a resulting image:
Positionals:
1 TEXT:FILE REQUIRED vol file (.vol, .longvol .p3d, .pgm3d and if DGTAL_WITH_ITK is selected: dicom, dcm, mha, mhd). For longvol, dicom, dcm, mha or mhd formats, the input values are linearly scaled between 0 and 255.
2 TEXT=result.pgm resulting image filename (in pgm or other).
Options:
-h,--help Print this help message and exit
-i,--input TEXT:FILE REQUIRED vol file (.vol, .longvol .p3d, .pgm3d and if DGTAL_WITH_ITK is selected: dicom, dcm, mha, mhd). For longvol, dicom, dcm, mha or mhd formats, the input values are linearly scaled between 0 and 255.
-o,--output TEXT resulting image filename (in pgm or other)
-m,--thresholdMin INT=128 threshold min (excluded) to define binary shape.
-M,--thresholdMax INT=255 threshold max (included) to define binary shape.
--rescaleInputMin INT=0 min value used to rescale the input intensity (to avoid basic cast into 8 bits image).
--rescaleInputMax INT=255 max value used to rescale the input intensity (to avoid basic cast into 8 bits image).
--nx FLOAT=0 set the x component of the projection direction.
--ny FLOAT=0 set the y component of the projection direction.
--nz FLOAT=1 set the z component of the projection direction.
-x,--centerX UINT=0 choose x center of the projected image.
-y,--centerY UINT=0 choose y center of the projected image.
-z,--centerZ UINT=0 choose z center of the projected image.
-w,--width UINT=100 set the width of the resulting height Field image.
--height UINT=100 set the height of the resulting height Field image.
--heightFieldMaxScan UINT set the maximal scan deep.
--setBackgroundLastDepth change the default background (black with the last filled intensity).
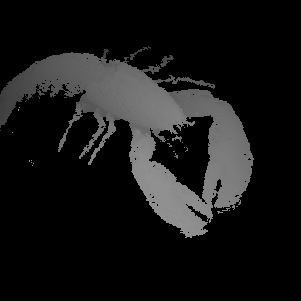
$ vol2heightfield ${DGtal}/examples/samples/lobster.vol resultingHeightMap.pgm -m 60 -M 500 --nx 0 --ny 0.7 --nz -1 -x 150 -y 0 -z 150 --width 300 --height 300 --heightFieldMaxScan 350 resultingHeightMap.pgm
resulting image.
- See also
- vol2heightfield.cpp
vol2obj
Usage: ./converters/vol2obj [OPTIONS] 1 [2]Allowed options are:
Positionals:
1 TEXT:FILE REQUIRED vol file (.vol, .longvol .p3d, .pgm3d or .sdp and if DGTAL_WITH_ITK is selected: dicom, dcm, mha, mhd). For longvol, dicom, dcm, mha or mhd formats, the input values are linearly scaled between 0 and 255.
2 TEXT output file (.obj or .off).
Options:
-h,--help Print this help message and exit
-i,--input TEXT:FILE REQUIRED vol file (.vol, .longvol .p3d, .pgm3d or .sdp and if DGTAL_WITH_ITK is selected: dicom, dcm, mha, mhd). For longvol, dicom, dcm, mha or mhd formats, the input values are linearly scaled between 0 and 255.
-o,--output TEXT output file (.obj or .off).
-m,--thresholdMin INT=128 threshold min (excluded) to define binary shape.
-M,--thresholdMax INT=255 threshold max (included) to define binary shape.
--rescaleInputMin INT=0 min value used to rescale the input intensity (to avoid basic cast into 8 bits image).
--rescaleInputMax INT=255 max value used to rescale the input intensity (to avoid basic cast into 8 bits image).
- See also
- vol2obj.cpp
vol2raw
Allowed options are:
Example:
Usage: ./converters/vol2raw [OPTIONS] 1 [2]
Positionals:
1 TEXT:FILE REQUIRED vol file (.vol, .longvol .p3d, .pgm3d and if DGTAL_WITH_ITK is selected: dicom, dcm, mha, mhd). For longvol, dicom, dcm, mha or mhd formats, the input values are linearly scaled between 0 and 255.
2 TEXT output file (.raw).
Options:
-h,--help Print this help message and exit
-i,--input TEXT:FILE REQUIRED vol file (.vol, .longvol .p3d, .pgm3d and if DGTAL_WITH_ITK is selected: dicom, dcm, mha, mhd). For longvol, dicom, dcm, mha or mhd formats, the input values are linearly scaled between 0 and 255.
-o,--output TEXT output file (.raw).
--rescaleInputMin INT=0 min value used to rescale the input intensity (to avoid basic cast into 8 bits image).
--rescaleInputMax INT=255 max value used to rescale the input intensity (to avoid basic cast into 8 bits image).
vol2raw input.vol out.raw
- See also
- vol2raw.cpp
vol2sdp
Allowed options are:
Example: You should obtain such a visualization:
vol2sdp ${DGtal}/examples/samples/lobster.vol volumeList.sdp
Usage: ./converters/vol2sdp [OPTIONS] 1 [2]
Positionals:
1 TEXT:FILE REQUIRED vol file (.vol, .longvol .p3d, .pgm3d and if DGTAL_WITH_ITK is selected: dicom, dcm, mha, mhd) or sdp (sequence of discrete points). For longvol, dicom, dcm, mha or mhd formats, the input values are linearly scaled between 0 and 255.
2 TEXT=result.sdp sequence of discrete point file (.sdp)
Options:
-h,--help Print this help message and exit
-i,--input TEXT:FILE REQUIRED
vol file (.vol, .longvol .p3d, .pgm3d and if DGTAL_WITH_ITK is selected: dicom, dcm, mha, mhd) or sdp (sequence of discrete points).
For longvol, dicom, dcm, mha or mhd formats, the input values are linearly scaled between 0 and 255.
-o,--output TEXT=result.sdp sequence of discrete point file (.sdp)
-e,--exportImageValues option to export also the image value of the voxel in a fourth field.
-m,--thresholdMin INT=128 threshold min (excluded) to define binary shape.
-M,--thresholdMax INT=255 threshold max (included) to define binary shape.
--rescaleInputMin INT=0 min value used to rescale the input intensity (to avoid basic cast into 8 bits image).
--rescaleInputMax INT=255 max value used to rescale the input intensity (to avoid basic cast into 8 bits image).
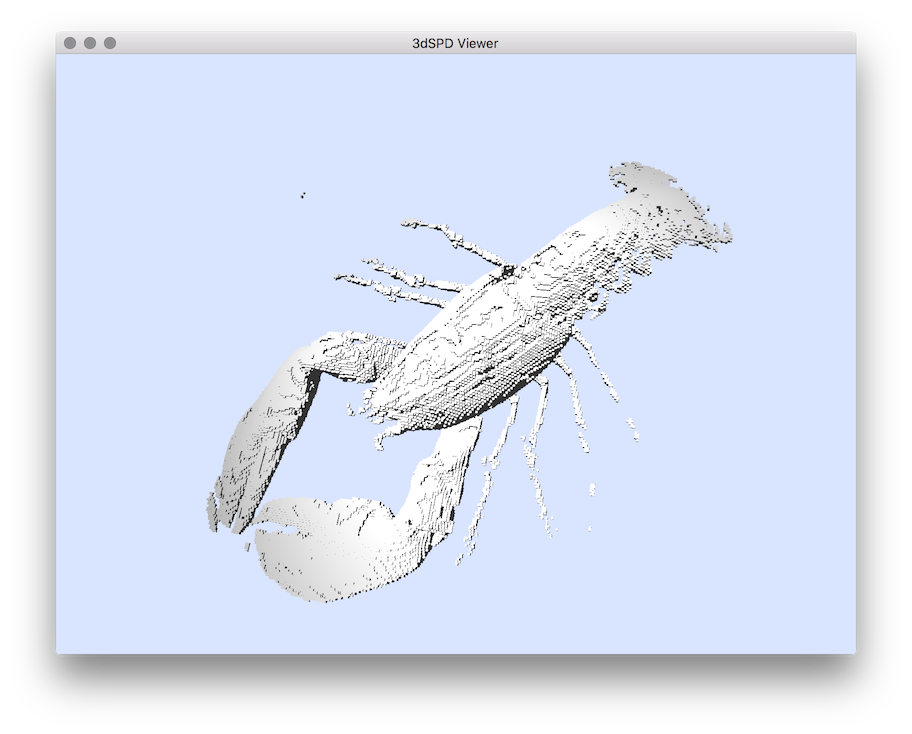
$ vol2sdp ${DGtal}/examples/samples/lobster.vol volumeList.sdp -m 70
# Visualisation:
$ 3dSDPViewer volumeList.sdp
resulting visualisation.
- See also
- vol2sdp.cpp
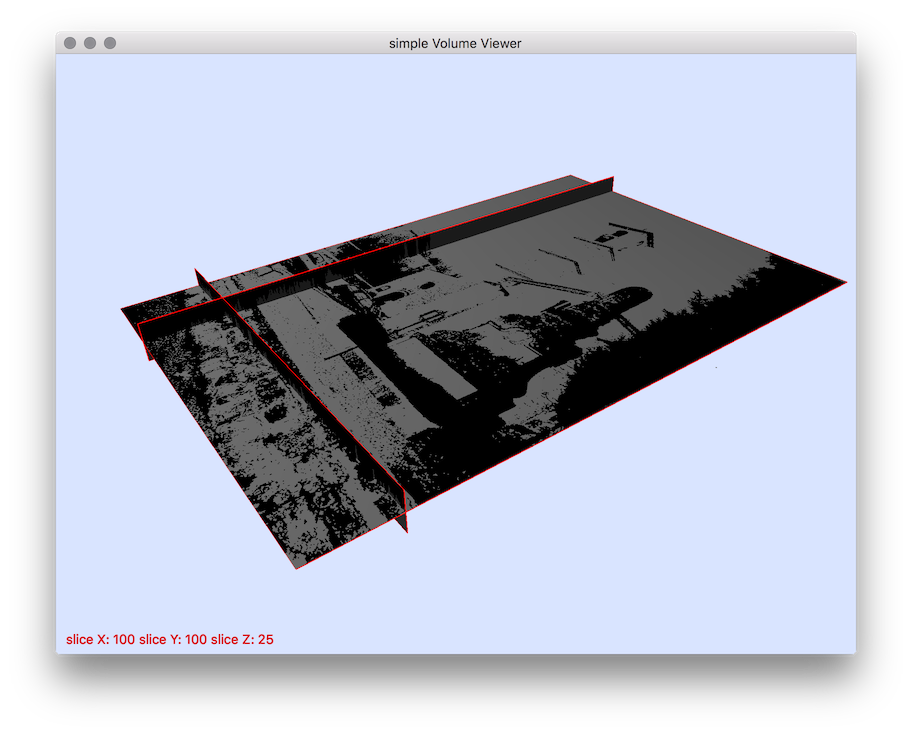
vol2slice
Usage: vol2slice [input] [output]Allowed options are:
Example: You should obtain such a visualization:
Typical use: to extract all slices defined in Y plane (y=cst):
vol2slice -i image3d.vol -s 1 -o slice.pgm
Usage: ./converters/vol2slice [OPTIONS] 1 [2]
Positionals:
1 TEXT:FILE REQUIRED vol file (.vol, .longvol .p3d, .pgm3d and if DGTAL_WITH_ITK is selected: dicom, dcm, mha, mhd). For longvol, dicom, dcm, mha or mhd formats, the input values are linearly scaled between 0 and 255.
2 TEXT=result.pgm base_name.extension: extracted 2D slice volumetric files (will result n files base_name_xxx.extension)
Options:
-h,--help Print this help message and exit
-i,--input TEXT:FILE REQUIRED vol file (.vol, .longvol .p3d, .pgm3d and if DGTAL_WITH_ITK is selected: dicom, dcm, mha, mhd). For longvol, dicom, dcm, mha or mhd formats, the input values are linearly scaled between 0 and 255.
-o,--output TEXT=result.pgm base_name.extension: extracted 2D slice volumetric files (will result n files base_name_xxx.extension)
-f,--setFirstSlice INT:NUMBER=0 Set the first slice index to be extracted.
-l,--setLastSlice INT:NUMBER Set the last slice index to be extracted (by default set to maximal value according to the given volume).
-s,--sliceOrientation UINT:{0,1,2}=2 specify the slice orientation for which the slice are defined (by default =2 (Z direction))
--rescaleInputMin INT=0 min value used to rescale the input intensity (to avoid basic cast into 8 bits image).
--rescaleInputMax INT=255 max value used to rescale the input intensity (to avoid basic cast into 8 bits image).
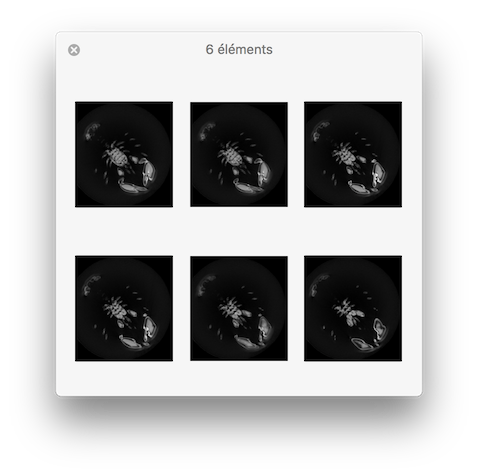
# Export Z slice images (-s 2):
$ vol2slice ${DGtal}/examples/samples/lobster.vol slice.pgm -f 10 -l 15 -s 2
resulting visualisation.
- See also
- vol2slice.cpp
vol2vox
Usage: vo2vox -i [input] -o [output]Allowed options are:
Example:
Positionals:
1 TEXT:FILE REQUIRED Input vol file.
2 TEXT=result.vox Output filename.
Options:
-h,--help Print this help message and exit
-i,--input TEXT:FILE REQUIRED Input vol file.
-o,--output TEXT=result.vox Output filename.
$ vol2vox ${DGtal}/examples/samples/Al.100.vol Al.100.vox
volBoundary2obj
Usage: converters/volBoundary2obj [OPTIONS] 1 [2]Allowed options are:
Example: You should obtain such a visualization:
Positionals:
1 TEXT:FILE REQUIRED vol file (.vol, .longvol .p3d, .pgm3d and if DGTAL_WITH_ITK is selected: dicom, dcm, mha, mhd). For longvol, dicom, dcm, mha or mhd formats, the input values are linearly scaled between 0 and 255.
2 TEXT output file (.obj or .off).
Options:
-h,--help Print this help message and exit
-i,--input TEXT:FILE REQUIRED vol file (.vol, .longvol .p3d, .pgm3d and if DGTAL_WITH_ITK is selected: dicom, dcm, mha, mhd). For longvol, dicom, dcm, mha or mhd formats, the input values are linearly scaled between 0 and 255.
-o,--output TEXT output file (.obj or .off).
-m,--thresholdMin INT=128 threshold min (excluded) to define binary shape.
-M,--thresholdMax INT=255 threshold max (included) to define binary shape.
--rescaleInputMin INT=0 min value used to rescale the input intensity (to avoid basic cast into 8 bits image).
--rescaleInputMax INT=255 max value used to rescale the input intensity (to avoid basic cast into 8 bits image).
-c,--customDiffuse UINT=[230,230,230,255] x 4
set the R, G, B, A components of the diffuse colors of the mesh faces.
-t,--triangulatedSurface save the dual triangulated surface instead instead the default digital surface.
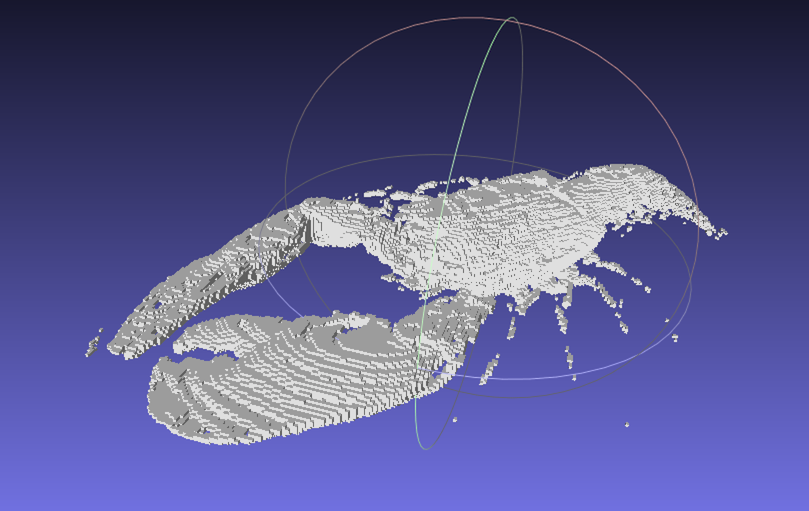
$ volBoundary2obj $DGtal/examples/samples/lobster.vol out.obj -m 80
resulting visualisation.
- See also
- volBoundary2obj.cpp
vox2vol
Usage: vox2vol -i [input] -o [output]Allowed options are:
Example:
Positionals:
1 TEXT:FILE REQUIRED
2 TEXT=result.vol
Options:
-h,--help Print this help message and exit
-i,--input TEXT:FILE REQUIRED
-o,--ouput TEXT=result.vol
$ vox2vol Al.100.vox Al.100.vol